Օգնություն:ՎիզուալԽմբագրիչ/Մասնակցի ուղեցույց
| Ուշադրություն. Եթե խմբագրում եք այս էջը, դուք համաձայնվում եք հրապարակել ձեր ներդրումը CC0 արտոնագրի ներքո։ Մանրամասն տեղեկությունների համար ծանոթացեք օգնության էջերի կանոնակարգին: |
| VisualEditor portal |
|---|
 |
| General |
| Խմբագրիչի մասին |
| Օգնություն սկզբի համար |
| Ցանկանո՞ւմ եք փորձել ՎիզուալԽմբագրիչն առանց հոդված խմբագրելու, այցելեք այստեղ: Ձեզ անհրաժեշտ չէ հաշիվ ունենալ, որպեսզի օգտագործեք ՎիզուալԽմբագրիչն այդ էջում: |
Բացվում է տեսողական խմբագիր
Սկսում. Տեսողական խմբագրի գործիքների տախտակը
| ՎիզուալԽմբագրիչի վահանակը հայտնվում է էկրանի վերևի մասում. վահանակում կգտնեք ձեզ հայնտի որոշ պատկերներ: | |
| Հետ շրջել և Կրկին անել ձեր արած փոփոխությունները: | |
 |
Headings pull-down menu: allows you to change how the paragraph is formatted. To change the style of a paragraph, put your cursor in the paragraph and select an item in this menu (you don't have to highlight any text). Section titles are formatted "Վերնագիր", and subsections are "Ենթավերնագիր 1", "Ենթավերնագիր 2", and so on. Տեքստի հիմնական ձևաչափը «Պարբերություն»-ն է: |
 |
Formatting: Pressing the "A" opens a menu.
If you have not selected any text, then when you press the "A" to open the menu, and then select an item, that formatting will apply to the text that you start typing, from wherever your cursor is located. |
 |
Linking tool: The chain icon is the linking tool. Pressing on it (usually after selecting some text) opens the link dialog. |
 |
«Ծանոթագրություն կոճակ». «Ծանոթագրություն» կոճակն օգտագործվում է ծանոթագրությունների ավելացման համար: Առկա է նաև «$re-use» պարամետրը: |
 |
Աղբյուր կոհակը. If the Citoid service and/or citation tool is enabled on your wiki, you will see a Աղբյուր button instead of a Ծանոթագրություն menu.
(Ծանոթագրությունների կաղապարներ «Ձեռքով» պարամետրին ավելացնելու համար տես ՎիզուալԽմբագրիչ/Ծանոթագրության գործիք էջը:) Instructions for enabling the Ավտոմատ tab are available at Enabling Citoid on your wiki The citoid service tries to fill out citation templates automatically. |
 |
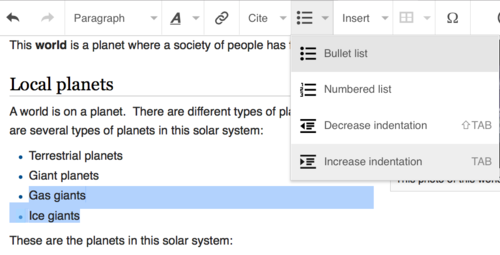
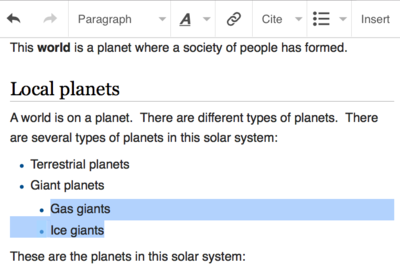
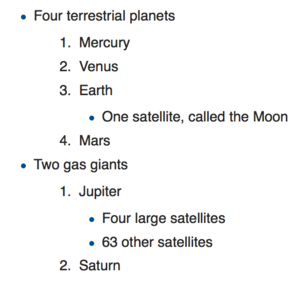
Ցանկեր և խորքեր. Առաջին երկու կոճակները թույլ են տալիս տեքստը ֆորմատավորել որպես «Չհամարակալված ցանկ» կամ «Համարակալված ցանկ»: Իսկ վերջին երկուսը կարգավորում են ցանկերի բովանդակության խորքերը: |
 |
Ավելացնել. «Ավելացնել» վահանակը տարբեր վիքիներում կարող է լինել տարբեր: Այստեղ ընդգրկված են բոլոր հնարավոր տարբերակները:
|
| Հատուկ նշանների ավելացում. «Հատուկ նշաններ» նշանի (Ω) վրա սեղմելուց հետո կբացվի պատուհան, որը ցույց է տալիս բազմաթիվ հատուկ նշաններ: Սեղմելով որևէ նշանի վրա` կարող եք այն ավելացնել տեքստում: (Այս էջը յուրահատուկ է յուրաքանչյուր վիքիի համար: Տես ՎիզուալԽմբագրիչ/Հատուկ նշաններ էջը:) | |
| Խմբագրեք ծանուցումներ կոճակը ցուցադրում է էջի բոլոր ծանուցումները: | |
 |
The Էջի կարգավորումներ menu is to the left of the Պահպանել button and the Փոխել խմբագրիչը menu. On this menu there is a button to open an Ընտրանքներ dialog with the following (left side) tabs:
The tabs of the Ընտրանքներ dialog are also displayed in the Էջի կարգավորումներ menu and can be opened by clicking on it. Furthermore the Էջի կարգավորումներ menu contains the items View as left-to-right or Ցուցադրել աջից ձախ and the item Գտնել և փոխարինել, which opens a bar, where you can insert words or regular expressions you are searching for and those to replace them with, together with several buttons for options. |
| The Փոխել խմբագրիչը button is next to the Պահպանել button. It allows you to switch to the wikitext editor. | |
Պահպանել խմբագրումը
Հղումների խմբագրում
 |
Links can be added through the "Հղում" icon (links in a chain) in the toolbar, or by using the shortcut Ctrl+K (or ⌘ Command+K on a Mac).
If you select (highlight) text and then press the "Հղում" button, that text will be used in creating the link. For a link that involves only one word, you can either select that word or just put the cursor within that word. |
 |
Եթե օգտագործում եք կոճակը, կբացվի պատուհան, որտեղ կարող եք խմբագրել հղումը:
ՎիզուալԽմբագրիչը կփորձի օգնել ձեզ ներքին հղումներ ման գալու գործում: Երբ արդեն վերջացրել եք համապատասխան հղման ընտրությունը, սեղմեք ↵ Enter կամ "Արված է" կոճակը կամ պարզապես պատուհանից դուրս մի տեղ: Ձեր հղումը ավտոմատաբար կերևա ՎիզուալԽմբագրիչի էջում: |
 |
Եթե ցանկանում եք արտաքին հղում տալ (կայքին), ընտրեք "Արտաքին հղում" կոճակը և մուտքագրեք հասցեն: |
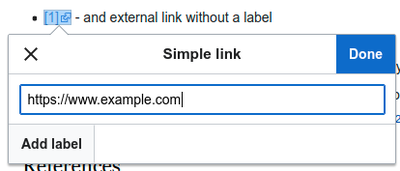 |
Առանց պիտակի արտաքին հղումները կերևան հետևյալ տեսքով` [1]: Դուք կարող եք ավելացնել սրանք` ձեր կուրսորը հեռու տանելով կամայական բառից: Բացեք հղման գործիքը` սեղմելով կոճակի վրա: Պատուհանում ներմուծեք URL-ն և սեղմեք "Արված է" կոճակը: |
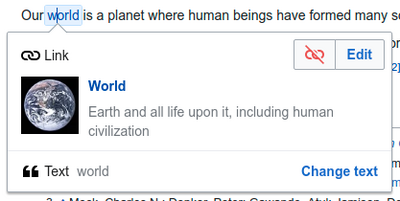 |
To change or remove an existing link, press within the text for that link, then press the "Հղում" icon that appears near it. The dialog will appear, for editing. You can also get to the dialog with the Ctrl+K keyboard shortcut. When a link is selected, it appears as blue framed.
Բացված պատուհանում կարող եք փոփոխել հասցեն, ինչպես նաև կարող եք հեռացնել հղումը` սեղմելով պատուհանի ներքևի ձախ անկյունում գտնվող "Հեռացնել" կոճակի վրա: You can also open the link's target in another window by pressing on the copy of the link in the dialog box. (You might want do this to check if an external link is valid.) If you want to exit the link label (the text displayed as a link) or continue to write after this link, you can press →:
To edit the link label of an existing link, press within the link label and type the new one. But if you want to replace the entire label, please note:
|
Ծանոթագրությունների խմբագրում
- For further information, see Help using citation templates or Help using citoid's Ավտոմատ tab
Determining which system is in place | |
| Your wiki may use one of three footnote systems. The one shown on the right is the simplest system, where the "Ծանոթագրություն" menu does not include any citation templates. If your wiki uses this system, then everything you need to know about footnotes is on this page. |  |
| In the second system, you again start by pressing the Աղբյուր button. Then a dialog box opens, which includes several popular citation templates set up for quick access in the "Ձեռքով" tab. If your wiki uses this system, then you will find more details at Help:VisualEditor/User guide/Citations-Templates |  |
| In the third system, you again start by pressing the Աղբյուր button. Then a dialog box opens, which includes an automatic citation process using the citoid service under the Automatic tab. If your wiki uses this system, you will find more details at Help:VisualEditor/User guide/Citations-Full |  |
|
Առկա ծանոթագրության խմբագրում | |
| To edit an existing reference, press on it where it appears in the text (usually as a bracketed number). You will see either a "Ծանոթագրություն" icon (bookmark) or an icon (and name) for the template that was used to create this reference. In either case, pressing on the "Խմբագրել" button will open a dialog where you can edit the reference. |  |
| For the "Ծանոթագրություն" icon, pressing "Խմբագրել" opens the reference dialog. To start changing the reference information, press on it.
Շատ վիքիներ ծանոթագրությունների մեջ կաղապարներ են օգտագործում: Եթե ձեր ծանոթագրությունը կաղապար է պարունակում, ապա կաղապարի ամբողջ տեքստը կընդգծվի, երբ դուք սեղմեք ծանոթագրության տեղեկության վրա: Եթե օգտագործվել է կաղապար և դուք սեղմել եք այդ կաղապարի տեղեկության վրա, ապա կհայտնվի $template նշանը: Սեղմեք այդ նշանի վրա, որպեսզի կաղապարի մինի խմբագրիչի պատուհանում խմբագրեք կաղապարի պարունակությունը: |
 |
| If what appears when you press on a reference is an icon for a standard template for citations (an example is at right), then pressing "Խմբագրել" will open the template editor dialog. |  |
| Կաղապարի մինի խմբագրիչում դուք կարող եք ավելացնել, հեռացնել կամ փոփոխել նրա պարունակությունը: Նոր դաշտեր ավելացնելու համար սեղմեք մինի խմբագրիչի ներքևի մասում գտնվող "Ավելացնել" կոճակի վրա: |  |
| Վերջացնելուց հետո սեղմեք «Կիրառել փոփոխությունները» կոճակի վրա: | |
Առկա ծանոթագրության կրկնակի օգտագործում | |
| Եթե էջն արդեն պարունակում է ձեր նախընտրած ծանոթագրությունը, դուք կարող եք պարզապես կրկին օգտագործել այն:
Առկա ծանոթագրությունը կրկին օգտագործելու համար տեղափոխեք ձեր կուրսորն այնտեղ, որտեղ ցանկանում եք այն ներդնել: Այնուհետև սեղմեք "Re-use reference" կոճակի վրա: (Note: If your wiki has the second or third footnote system described above, you'll see a "Կրկին օգտագործում" tab, in a dialog, instead of a "Կրկին օգտագործում" item on the "Ծանոթագրություն" menu.) |
 |
| $reference-title պատուհանում ընտրեք ձեր նախընտրած ծանոթագրությունների այն ցուցակը, որը ցանկանում եք կրկին օգտագործել: |  |
Նոր ծանոթագրության ավելացում | |
| "$cite" վահանակը օգտագործելով` կարող եք ավելացնել ծանոթագրություն: Տեղափոխեք ձեր կուրսորն այնտեղ, որտեղ ցանկանում եք այն ավելացնել: Այնուհետև վահանակից ընտրեք ծանոթագրության համապատասխան տիպը: Then click "Հիմնական". |  |
«Հիմնական» ծանոթագրության օգտագործում | |
| Shown here is what you will see if you select the basic references item. In the Reference editor, you can add your citation, including formatting.
Դուք կարող եք հավաքել ծանոթագրությունները որոշակի խմբերի մեջ: |
 |
| Եթե ցանկանում եք նոր ծանոթագրության մեջ կաղապար ներդնել, ապա Ծանոթագրության պատուհանում սեղմեք Կաղապարի վրա: |  |
| Այնուհետև փնտրեք ձեր ուզած կաղապարը, ավելացրեք այն և խմբագրեք ինչպես սովորական այլ կաղապար:
Ավարտելուց հետո սեղմեք "Կիրառել փոփոխությունները" կոճակի վրա: |
 |
| Եթե խմբագրվող հոդվածում դեռևս չկա ծանոթագրությունների ցանկ, ապա դուք պետք է որոշեք ցանկի գտնվելու վայրը:
Տեղափոխեք կուրսորն այնտեղ, որտեղ ցանկանում եք, որպեսզի երևա ծանոթագրությունների ցուցակը (սովորաբար էջի ներքևում), ապա սեղմեք "Ավելացնել" կոճակի վրա և ընտրեք "Ծանոթագրությունների ցանկ" տարբերակը: |
 |
| Եթե օգտագործում եք ծանոթագրությունների մի քանի խմբեր, ապա կարող եք ընտրել խումբը պատուհանում: Կցուցադրվեն միայն այն ծանոթագրությունները, որոնք պատկանում են այդ խմբին:
Ավարտելուց հետո սեղմեք "Ներդնել": |
 |
Ստանդարտ ծանոթագրությունների կաղապարների օգտագործում | |
| Ձեր վիքին կարող է այս վահանակին ավել ծանոթագրության կաղապարներ ավելացրած լինել: (Ձեր վիքիում ավել ծանոթագրության կաղապարներ ավելացնելու մասին տեղեկություն առկա է ՎիզուալԽմբագրիչ/Ծանոթագրության գործիք էջում:) |  |
| Սեղմելով որևէ կաղապարի նկարի վրա` կբացվի մինի խմբագրիչ: |  |
| Նոր պարամետրեր ավելացնելու համար մինի խմբագրիչում իջեք ներքև և սեղմեք "Ավելացնել" կոճակը:
Ավարտելուց հետո սեղմեք "Ներդնել": |
 |
Նկարների և այլ նիշքերի խմբագրում
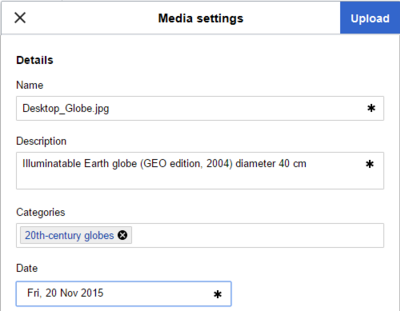
Պատկերների վերբեռնում
Պատկերասրահների խմբագրում
Կաղապարների խմբագրում
The powerful MediaWiki template system lets you insert dynamic content, text from other pages, and much more. For a detailed explanation and examples, see the Templates help page.
In the VisualEditor you can search for a relevant template, add an invocation or transclusion on the page you’re editing and, if needed, add custom content using parameters.
Insert new template
| Նոր կաղապար ավելացնելու համար ձեր կուրսորը տարեք այնտեղ, որտեղ ցանկանում եք այն ավելացնել և սեղմեք "$template" կոճակի վրա: Then open the Ավելացնել menu and select " |
 |
| Find the template you want to insert by typing either its name or a relevant keyword. Results containing the search term in either the name or description will display in a dropdown. This should help you find a relevant template, even if you don’t know its exact name.
If you’re having trouble finding the kind of template you want by using keywords, you can look on other wiki pages with similar content and view or edit the page source to see which templates are in use. When you find the desired template’s name, you can type it into this field to insert it here. |
 |
| You can also edit a template that’s already on a page. When you select the template you want to edit, it turns blue, and a box appears displaying " |
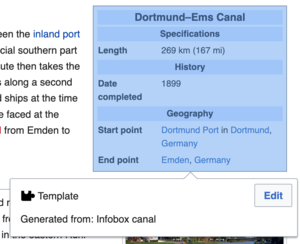 |
| Some templates are not visible to someone reading a page. In the visual editor, such hidden templates are still shown so that you can click and edit or delete them. The name of the template will be shown next to the puzzle icon and both will be grayed out. |  |
|
Կաղապարների պարամետրեր | |
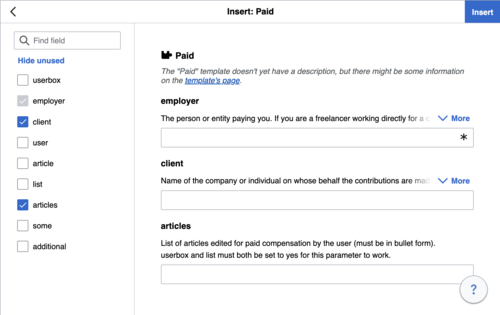
| You’ll see this dialog box when you’re adding a new template or editing one already in place. What you see in the box depends on whether the template in question contains TemplateData, helpful metadata added by other editors to make it easier to edit templates in the Visual Editor.
When a template contains TemplateData, the VisualEditor can use it to present annotated fields for you to fill in.
|
 |
| You can disable any optional parameter (which have blue checkboxes on the left side). If a parameter’s checkbox is grayed out and not clickable, the template requires that parameter, so it can’t be disabled.
When you insert a new template, you may find that some optional parameters are pre-selected. That means the author(s) of the template recommends the use of those parameters. It’s best to review all parameters that will be used in a template to ensure you understand their use. Clicking an unchecked parameter adds it to the template. Clicking a parameter that’s already been added takes you to the parameter’s input field. Some template parameters will show as “deprecated”. Don’t use deprecated parameters when inserting a template; they’re only visible to you because those parameters are in use on older pages where this template was included. |
 |
Adding undocumented parameters | |
| If you’re inserting or editing a template whose author hasn’t laid out its parameters in TemplateData, it has what we call “undocumented” or “unnamed parameters”. In these cases, you should consult the page for the template itself. There you can learn how to correctly employ and work with all of the template’s parameters. This includes learning the exact names of the parameters as written by the template author.
If you find in the documentation that the template expects parameters without names, fill in numbers as placeholders for the parameter names using the undocumented parameter input, then add text to the values you want to provide as you normally would. Example:
If you accidentally include nonexistent, misspelled or erroneous parameters, the values you enter for those parameters won’t show up on the page you’re editing. |
 |
Autogenerated parameters | |
| In this example, the template in question lacks TemplateData but it was possible to autogenerate the parameters. This means that the undocumented parameters have already been added for you, but the names may not be easily understandable and the dialog cannot display any directions or descriptions. As a result the dialog box provides a link to the template’s documentation, which should help you deduce and fill in the template’s various parameters. |  |
Editing multi-part template content | |
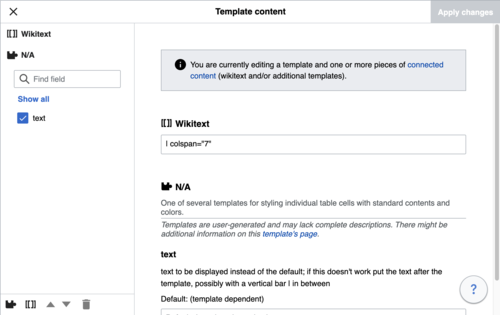
| During editing, you may open template content consisting of multiple templates or a single template linked to some wikitext. This differs from the nested templates described below. In this case, the templates are better visualized as being stacked or connected.
This content often contains “unbalanced templates,” templates which are incomplete on their own and need to be paired with some wikitext or another template in order to function. These related pieces of template content must be created in wikitext, but can be edited in the VisualEditor. In these cases you will see a notice at the top of the dialog to signal the situation and a specialized toolbar will be visible at the bottom of the sidebar. There you can use the icon buttons to add additional templates, additional wikitext, delete elements or change their order. |
 |
Nested templates | |
| Templates can include other templates as the value for parameters. You’ll recognize it when you see a parameter whose value contains the double curly braces ( {{ }} ) denoting a template.
The VisualEditor can’t present this template within a template (a nested template) using the editor’s easy-to-use interface, so if you want to nest a template yourself, you’ll need to understand how to add the template by hand in wikitext into the appropriate parameter field. |
 |
Completing your edit | |
| When you have finished editing a template, you can click "Կիրառել փոփոխությունները". Then you can preview your edit and make sure it looks the way you want and expect.
You may also see an error message, which (like the other TemplateData mentioned above) is community-provided content and may vary in usefulness. You may need to consult the template’s own documentation to get to the bottom of some errors. If you’re still having trouble, consider posting about your problem on the template’s talk page. |
|
Removing a template | |
| To remove a template in the VisualEditor, click the template box. Press the "Delete" or "Backspace" key on your keyboard. The template will disappear from the page. |  |
Editing on mobile | |
| When editing a template on a page using the VisualEditor on a mobile device, you’ll see that the sidebar starts out hidden. You can make it visible by pressing the “Show/hide options” button. |  |
Կաղապարների փոխարինում | |
| When you insert a template in a wiki page, its content and appearance are reevaluated every time the page loads, based on the template code and the values of its parameters. This means if someone updates the code of a template, then every page which uses that template will also get updated when they publish.
There’s another, much less common way to use templates, though, and that’s to substitute a template. Doing this permanently includes the template content just as it appears at the moment you insert it. It will not update if the template code is later changed. Most users won’t ever need to resort to substitution. Substitution is typically only useful when you need to capture the exact appearance of one version of a template, such as when content is under development and needs evaluation. To substitute a template in the VisualEditor, insert a template using the name syntax When you’re finished, press “Ներդնել”, which will insert the template content as you see it. |
 |
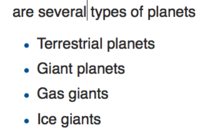
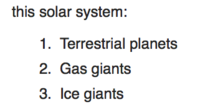
Editing lists
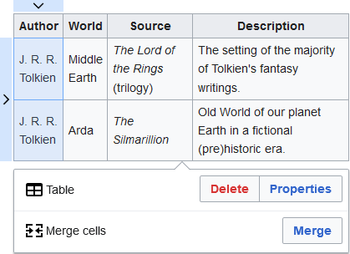
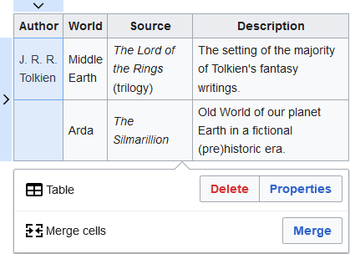
Աղյուսակների խմբագրում
Կատեգորիաների խմբագրում
 |
Կատեգորիաները խմբագրելու համար սեղմեք "Էջի կարգավորումներ" բաժնի "Կատեգորիաներ" կոճակին: |
 |
"Կատեգորիաներ" կոճակը բացում է պատուհան, որը թվարկում է առկա կատեգորիաները և թույլ է տալիս ավելացնել նորերը:
You also have the option of setting or changing the general (default) sorting key, which determines where the page appears when listed with other pages in the same category. Օրինակ` կարող եք կարգավորել, թե որ տառի տակ գտնվի "Ջորջ Վաշինգտոն" հոդվածը "ԱՄՆ-ի նախագահներ" կատեգորիայում (Ջ կամ Վ): |
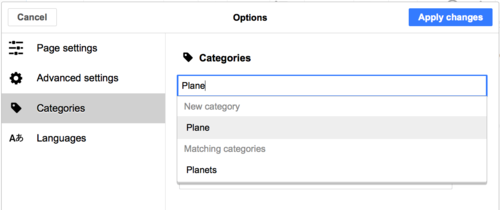 |
Էջին կատեգորիա ավելացնելու համար հավաքեք կատեգորիայի անվանումը "Ավելացնել կատեգորիա" դաշտում: Ձեր հավաքելու ընթացքում ՎիզուալԽմբագրիչը կփորձի արագ գտնել համընկնող և գոյություն ունեցող կատեգորիաներ: |
 |
Առկա կատեգորիան հանելու համար սեմղեք նրա վրա և այնուհետև սեղմեք բացված պատուհանի "Հեռացնել" կոճակի վրա:
Սեղմելով կատեգորիայի վրա` կարող եք նշել այդ կատեգորիայի դասավորման սկզբունքը: |
| Press "Կիրառել փոփոխությունները" when you are done editing categories to return to the page editor. | |
Էջի կարգավորումների խմբագրում
Editing maps
 |
You can add and change maps. See Help:VisualEditor/Maps. |
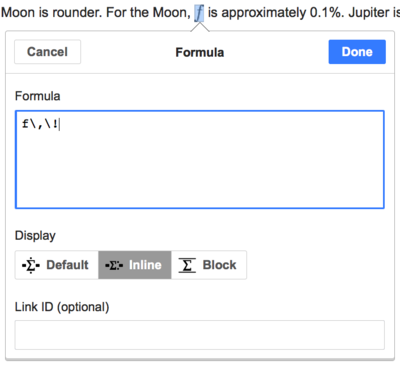
Մաթեմատիկական բանաձևի խմբագրում
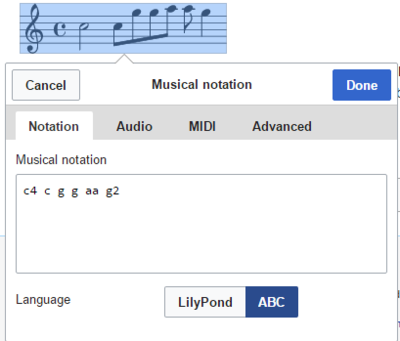
Editing musical scores
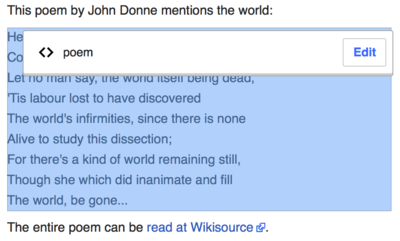
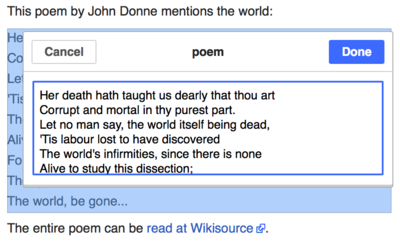
Բանաստեղծությունների և այլ հատուկ պարբերությունների խմբագրում
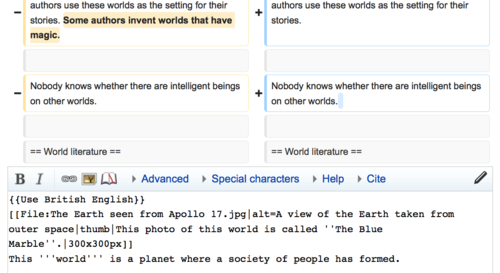
Switching between the visual and wikitext editors
Ստեղնաշարի պիտակներ
Բազմաթիվ խմբագիրներ սովոր են ավելացնել վիքիտեքստ (օրինակ` թավատառ կամ շեղատառ դարձնելու կոդերը): Ստեղնաշարի արագ օգտագործման ստեղները կօգնեն ավելի պարզ ձևով ավելացնել դրանք: Ահա ՎիզուալԽմբագրիչում հաճախ կիրառվող արագ օգտագործման ստեղները.
| Համակարգչի պիտակ | Գործողություն | Մաքի պիտակ |
|---|---|---|
| Ctrl+B | Թավատառ | ⌘ Cmd+B |
| Ctrl+I | Շեղատառ | ⌘ Cmd+I |
| Ctrl+K | Հղման ավելացում | ⌘ Cmd+K |
| Ctrl+X | Կտրել | ⌘ Cmd+X |
| Ctrl+C | Պատճենել | ⌘ Cmd+C |
| Ctrl+V | Տեղադրել | ⌘ Cmd+V |
| Ctrl+Z | Չեղյալ հայտարարել | ⌘ Cmd+Z |
Also see the full list of all keyboard shortcuts.


