Segítség:VisualEditor/Használati útmutató
| Megjegyzés: Amikor szerkeszted ezt a lapot, beleegyezel a szerkesztésed CC0 alatti közzétételébe. Lásd a Public Domain Help Pages lapot további információkért. |
| VisualEditor-portál |
|---|
 |
| Általános |
| Rólunk |
| Az elindítással kapcsolatos segítség |
| Ha szeretnéd kipróbálni a Visual Editort szócikk szerkesztése nélkül, ezen az oldalon megteheted. Nem szükséges regisztrálnod a Visual Editor kipróbálásához azon a lapon. |
A VisualEditor elindítása
Első lépések: a VisualEditor eszköztára
| Amikor elindítod a VisualEditort, a képernyő felső részén találod a szerkesztőmenüt. Az ikonok egy része ismerős lehet: | |
| Visszavon és Újra a változtatásaidra értve. | |
 |
A Fejlécek lenyíló menüvel lehetőséged van a bekezdés formázásának módosítására. Egy bekezdés stílusának megváltoztatásához helyezd a kurzort a bekezdésbe, majd válassz ki egy elemet a menüből (nem szükséges szöveget kijelölnöd). A szakaszok címét "$format", az alszakaszokét "$subheading2", "$subheading3", és a további stílusokkal formázd. To change the style of a paragraph, put your cursor in the paragraph and select an item in this menu (you don't have to highlight any text). Section titles are formatted "Címsor", and subsections are "Alcím 1", "Alcím 2", and so on. A szövegek alapstílusa a "Bekezdés" stílus. |
 |
Formátum: Az „A” betűre kattintva lenyílik egy menü.
Ha nem jelöltél ki szöveget, és megnyomod az "A" gombot, hogy legördüljön a menü, majd kiválasztasz egy menüpontot, akkor a kiválasztott formázás lesz érvényben, amikor elkezded begépelni a szöveget, a kurzor helyétől kezdődően. |
 |
Hivatkozás menüpont: a lánc ikon a hivatkozás menüpontot rejti. Ha rákattintasz (általában miután kijelöltél egy szövegrészt), megjelenik a hivatkozás hozzáadása menü. |
 |
Forráshivatkozás menü: A Forráshivatkozás menüben forráshivatkozásokat (lábjegyzeteket) lehet elhelyezni a szövegben. Mindegyik projekt rendelkezik hozzáféréssel az alapvető forráshivatkozás-formátumokhoz, és ennek a menüpontnak a segítségével lehetőségük van a forráshivatkozások újrafelhasználásához is. |
 |
Forrás gomb: Ha a Citoid engedélyezve van, a Forráshivatkozás helyett a Forrás gombot fogod látni.
(A helyi forrássablonok hozzáadásához a Kézi menühöz itt található leírás: VisualEditor/Citation tool.) Instructions for enabling the Automatikus tab are available at Enabling Citoid on your wiki A Citoid megpróbálja automatikusan előállítani a forráshivatkozást. |
 |
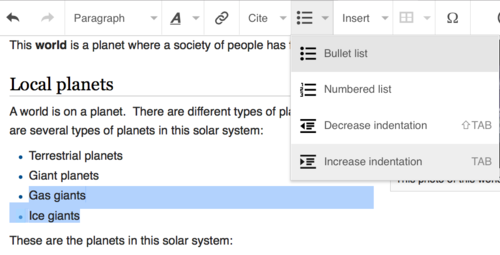
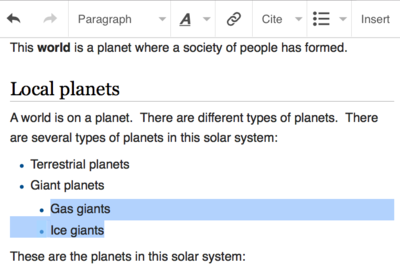
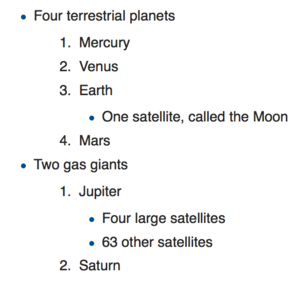
Listák és behúzások: Az első két gomb lehetővé teszi, hogy "Számozott lista" vagy "Felsorolásjeles lista" listát készítsünk. Az utolsó két gomb a listaelemek behúzásának mértékét csökkenti vagy növeli. |
 |
Beszúrás: Az "Beszúrás" menü egyes projektekben máshogy nézhet ki. Alább egy lista az összes lehetséges beállítási lehetőséget mutatja.
|
| Speciális karakter beszúrása: A "Speciális karakter" (Ω) ikon a Beszúrás menü mellett lehetővé teszi, hogy speciális karaktert szúrj be a szövegbe. Ez lehet például szimbólum, ékezetes betű vagy matematikai jelölés. (Ez a lista lokálisan testre szabható. Instrukciókhoz lásd: VisualEditor/Speciális karakterek) | |
| A Szerkesztési bevezetők gomb az adott lapra vonatkozó értesítéseket mutatja meg (például, hogy a lap védett). | |
 |
A Lapbeállítások menü a Változtatások közzététele és a Szerkesztő váltása gombtól balra helyezkedik el. Az Opciók menüpont alatt a következő (bal oldali) fülek találhatóak:
Az Beállítások párbeszédpanel fülei a Lapbeállítások menüben is elérhetők. A Lapbeállítások menüben található még a Megtekintés balról jobbra vagy Megtekintés jobbról balra gomb, valamint a Keresés és csere gomb, utóbbi egy párbeszédpanelt nyit meg, ahová karaktereket, szavakat vagy reguláris kifejezéseket gépelhetsz be, melyekre rá szeretnél keresni a szövegben, és a kívánt kifejezésekkel helyettesíteni őket. A párbeszédpanelen beállítási lehetőségeket is találsz. |
| A Szerkesztő váltása gomb a Változtatások közzététele gomb mellett helyezkedik el (a ceruza ikonra kattintva gördül le). Segítségével a wiki-jelölőnyelvet használó szerkesztőre válthatsz. | |
Változtatások közzététele
Hivatkozások szerkesztése
 |
Hivatkozásokat az eszköztáron lévő "Hivatkozás" ikonnal (láncszemek egy láncban) is hozzáadhatsz, vagy a Ctrl+K billentyűkombináció használatával (Mac-en: ⌘ Command+K).
Ha kijelölsz egy szövegrészt és megnyomod a "Hivatkozás" gombot, a kijelölt szöveget fogja felhasználni a hivatkozáshoz. Ha csak egyetlen szóra szeretnél hivatkozást készíteni, kijelölheted a szót, vagy elhelyezheted benne a kurzort. |
 |
Mikor használod a gombot, vagy a shortcutot, akkor egy párbeszédpanel fog megnyílni, melybe beírhatod a linket.
Az eszköz megpróbálja majd megkeresni a lehetséges belső hivatkozást a begépelt szöveg alapján és valószínűsíthető egyezéseket ajánl fel. Ha már egyszer begépeltél, vagy kiválasztottál egy linket, akkor az ↵ Enter gomb lenyomásával vagy a panel "Kész" gombjának megnyomásával befejezheted a folyamatot. A hivatkozás rögtön megjelenik a VisualEditor lapon, de a teljes lap közzétételéig ennek a közzététele sem történik meg. |
 |
Külső weboldalra szóló hivatkozáshoz a folyamat hasonló: Válaszd a "Külső oldal" fület, majd írd be az URL-t a dobozba. |
 |
A címke nélküli külső hivatkozások így néznek ki: [1]. Úgy hozhatod létre, ha a szavakon kívül (például egy szóköz után) helyezed el a kurzort. Nyomd meg a Hivatkozás gombot vagy használd a billentyűkombinációt a párbeszédablak megnyitásához. Írd be az URL-t a rubrikába és nyomd meg a the "Kész" gombot a hivatkozás elhelyezéséhez. |
 |
Már létező hivatkozás megváltoztatásához vagy törléséhez kattints a hivatkozást alkotó szövegre, majd nyomd meg a mellette megjelenő "Hivatkozás" ikont. Egy párbeszédpanel jelenik meg a szerkesztéshez. A párbeszédpanelt a Ctrl+K billentyűkombinációval is elérheted. Ha egy hivatkozás ki van választva, kék kerettel jelenik meg.
A párbeszédpanelen ezután megváltoztathatod a hivatkozás célját. A hivatkozást a panel jobb felső sarkában található "Eltávolítás" gombbal törölheted. Meg is nyithatod hivatkozást egy új ablakban, ha a helyi menüben a hivatkozásra kattintasz. (Ez azért kellhet például, hogy ellenőrizd, hogy jó-e egy adott külső hivatkozás.) Ha ki akarsz lépni a hivatkozás szerkesztéséből, és folytatni akarod a szerkesztést a hivatkozás utáni szövegen, akkor nyomd meg a → gombot:
A hivatkozás címkéjének szerkesztéséhez kattints a címkébe és írd be a kívánt szöveget. Ugyanakkor, ha a teljes címkét le szeretnéd cserélni, vedd figyelembe az alábbiakat:
|
Hivatkozások szerkesztése
- További információkért lásd: Segítség a hivatkozássablonok használatához vagy Segítség a citoid Automatikus gombjának használatához
|
= A te nyelvi változatodban használt rendszer meghatározása | |
| A wikidben az alábbi három forráshivatkozás-rendszer egyikét használják. A jobb oldali kép által illusztrált a legegyszerűbb verzió, ahol a "Forráshivatkozás" (Cite) menüben nincsenek hivatkozássablonok. Ha a wikid ezt a rendszert használja, akkor minden, amit tudnod kell a forráshivatkozásokról, ezen az oldalon található. |  |
 | |
| In the second system, you again start by pressing the Forrás button. Then a dialog box opens, which includes several popular citation templates set up for quick access in the "Kézi" tab. Ha a wikid ezt a rendszert használja, a Help:VisualEditor/User guide/Citations-Templates oldalon találsz hozzá leírást. |  |
| A harmadik rendszerben a Forrás gombot kell először megnyomni. Megjelenik egy párbeszédablak, ahol automatikusan lehet forráshivatkozást létrehozni a citoid segítségével az Automatikus fül alatt. Ha a wikid ezt a rendszert használja, a Help:VisualEditor/User guide/Citations-Full oldalon találsz hozzá részletes leírást. |  |
|
Egy létező hivatkozás szerkesztése | |
| To edit an existing reference, press on it where it appears in the text (usually as a bracketed number). You will see either a "Forráshivatkozás" icon (bookmark) or an icon (and name) for the template that was used to create this reference. In either case, pressing on the "Szerkesztés" button will open a dialog where you can edit the reference. |  |
| For the "Forráshivatkozás" icon, pressing "Szerkesztés" opens the reference dialog. To start changing the reference information, press on it.
Számos wiki használ sablonokat a forráshivatkozások formázására. Ha a kurzort a forráshivatkozásra mozgatod, a mező összes információja ki lesz emelve. If a template was used and you press on the reference information, then the Sablon icon (puzzle piece) will appear with some information. Press on the "Szerkesztés" button to edit the content of the template in the template editor dialog. |
 |
| If what appears when you press on a reference is an icon for a standard template for citations (an example is at right), then pressing "Szerkesztés" will open the template editor dialog. |  |
| Inside the template editor, you can add or remove types of information or change current content. Only fields (template parameters) that have content will show, initially. To add fields, press on "Hozzáadás" at the bottom of the editor. |  |
| Kattints a „Változtatások alkalmazása” feliratra, ha végeztél. | |
Létező hivatkozások újrafelhasználása | |
| If the page already contains a citation that applies to the text you want to source, then you can choose to re-use that existing citation.
Ahhoz, hogy egy létező hivatkozást újra fel tudj használni, vidd az egeret oda, ahová a hivatkozást be akarod illeszteni és kattints a Újrahasználás ikonra az Forráshivatkozás menüben. (Note: If your wiki has the second or third footnote system described above, you'll see a "Újrafelhasználás" tab, in a dialog, instead of a "Újrahasználás" item on the "Forráshivatkozás" menu.) |
 |
| A Forráshivatkozás párbeszédablakban nézd meg a listát a felhasználni kívánt hivatkozáshoz, és válaszd ki. Ha sok hivatkozás van, akkor használd a keresőt (melyet a „Keresés jelenlegi forráshivatkozásokban” címke mutat), hogy csak olyan találatokat kapj, amely az adott szöveggel megegyezik. |  |
Új hivatkozás hozzáadása | |
| Ahhoz, hogy új hivatkozást tudj hozzáadni a Forráshivatkozás menün keresztül, helyezd a kurzort oda, ahová a hivatkozást tenni szeretnéd. Then click "Egyszerű". |  |
Using the "Egyszerű" citation | |
| Shown here is what you will see if you select the basic references item. A hivatkozásszerkesztőben hozzáadhatod, szerkesztheted és formázhatod a hivatkozás szövegét.
Akár egy egész adott csoportnak is hivatkozást készíthetsz, ezt arra lehet felhasználni, hogy megmutassuk az összetartozó csoportokat a Forráshivatkozások listája eszközzel. |
 |
| Ha új hivatkozást adsz egy sablonhoz és azt akarod, hogy az tartalmazza is azt, akkor kattints a Beszúrás eszköztár Sablon ikonjára (kirakósdarab) a hivatkozásszerkesztőben. |  |
| Eztán nézd meg azt a sablont, amelyet használni akarsz, add hozzá a hivatkozást és szerkeszd át, úgy, mint egy már létező hivatkozás esetén. (A sablonokkal kapcsolatos ovábbi információkért lásd: Sablonok szerkesztése.)
Kattints a Változtatások alkalmazása feliratra a hivatkozásszerkesztőre való visszatéréshez, és még egyszer a Változtatások alkalmazása feliratra a lapra való visszatéréshez. |
 |
| Ha még nincs hivatkozások listája az adott lapon (például te adod hozzá az első hivatkozást), akkor szükséged lesz arra, hogy hozzá legyen rendelve ahhoz a szöveghez, amelyet te hivatkozással akarsz ellátni.
Vidd a kurzort oda, ahol a hivatkozások listáját meg akarod jeleníteni (általában a lap alja), nyisd meg a „Beszúrás” menüt és kattints a „Forráshivatkozások listája” ikonra (három könyv) a hozzáadáshoz. |
 |
| Ha hivatkozások csoportját szerkeszted, határozd meg ezt a párbeszédpanelen, hogy elkülönülten jelenjenek meg a hivatkozások, melyek összetartoznak.
The final step in the References list dialog is to press "Beszúrás". |
 |
Using standard cite templates | |
| Your local wiki may have added extra citation templates to the "Forráshivatkozás" menu. If so, you have quick access to the most-used citation templates for your wiki. (Instructions for adding extra citation templates to your local wiki are available at VisualEditor/Citation tool.) |  |
| Pressing on a template icon such as "Cite book" will take you into the template editor for that template. Important information fields may be marked with an asterisk. While the most common fields will be shown, not all of them are required. |  |
| To add more parameters, scroll down in the template editor and press on the "Hozzáadás" option.
Press on "Beszúrás" when you are done. |
 |
Képek és egyéb médiafájlok szerkesztése
Uploading images
Editing media galleries
Editing templates
The powerful MediaWiki template system lets you insert dynamic content, text from other pages, and much more. For a detailed explanation and examples, see the Templates help page.
In the VisualEditor you can search for a relevant template, add an invocation or transclusion on the page you’re editing and, if needed, add custom content using parameters.
Insert new template
| Új sablon hozzáadásához vidd a kurzort oda, ahová a sablont tenni akarod, majd kattints erre az ikonra az eszköztárban ($insert): $template. Then open the Beszúrás menu and select " |
 |
| Find the template you want to insert by typing either its name or a relevant keyword. Results containing the search term in either the name or description will display in a dropdown. This should help you find a relevant template, even if you don’t know its exact name.
If you’re having trouble finding the kind of template you want by using keywords, you can look on other wiki pages with similar content and view or edit the page source to see which templates are in use. When you find the desired template’s name, you can type it into this field to insert it here. |
 |
| You can also edit a template that’s already on a page. When you select the template you want to edit, it turns blue, and a box appears displaying " |
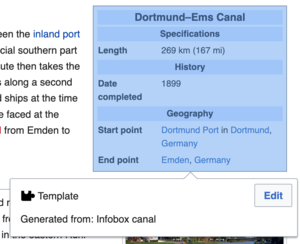 |
| Some templates are not visible to someone reading a page. In the visual editor, such hidden templates are still shown so that you can click and edit or delete them. The name of the template will be shown next to the puzzle icon and both will be grayed out. |  |
|
Sablon paraméterek | |
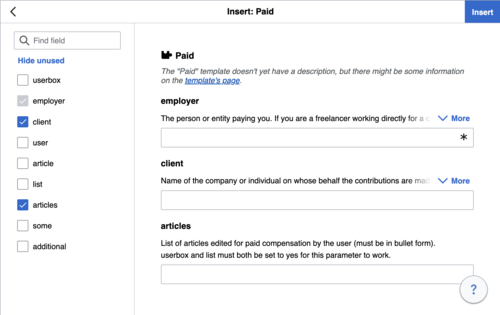
| You’ll see this dialog box when you’re adding a new template or editing one already in place. What you see in the box depends on whether the template in question contains TemplateData, helpful metadata added by other editors to make it easier to edit templates in the Visual Editor.
When a template contains TemplateData, the VisualEditor can use it to present annotated fields for you to fill in.
|
 |
| You can disable any optional parameter (which have blue checkboxes on the left side). If a parameter’s checkbox is grayed out and not clickable, the template requires that parameter, so it can’t be disabled.
When you insert a new template, you may find that some optional parameters are pre-selected. That means the author(s) of the template recommends the use of those parameters. It’s best to review all parameters that will be used in a template to ensure you understand their use. Clicking an unchecked parameter adds it to the template. Clicking a parameter that’s already been added takes you to the parameter’s input field. Some template parameters will show as “deprecated”. Don’t use deprecated parameters when inserting a template; they’re only visible to you because those parameters are in use on older pages where this template was included. |
 |
Adding undocumented parameters | |
| If you’re inserting or editing a template whose author hasn’t laid out its parameters in TemplateData, it has what we call “undocumented” or “unnamed parameters”. In these cases, you should consult the page for the template itself. There you can learn how to correctly employ and work with all of the template’s parameters. This includes learning the exact names of the parameters as written by the template author.
If you find in the documentation that the template expects parameters without names, fill in numbers as placeholders for the parameter names using the undocumented parameter input, then add text to the values you want to provide as you normally would. Example:
If you accidentally include nonexistent, misspelled or erroneous parameters, the values you enter for those parameters won’t show up on the page you’re editing. |
 |
Autogenerated parameters | |
| In this example, the template in question lacks TemplateData but it was possible to autogenerate the parameters. This means that the undocumented parameters have already been added for you, but the names may not be easily understandable and the dialog cannot display any directions or descriptions. As a result the dialog box provides a link to the template’s documentation, which should help you deduce and fill in the template’s various parameters. |  |
Editing multi-part template content | |
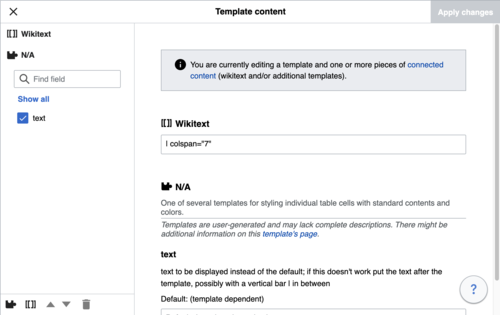
| During editing, you may open template content consisting of multiple templates or a single template linked to some wikitext. This differs from the nested templates described below. In this case, the templates are better visualized as being stacked or connected.
This content often contains “unbalanced templates,” templates which are incomplete on their own and need to be paired with some wikitext or another template in order to function. These related pieces of template content must be created in wikitext, but can be edited in the VisualEditor. In these cases you will see a notice at the top of the dialog to signal the situation and a specialized toolbar will be visible at the bottom of the sidebar. There you can use the icon buttons to add additional templates, additional wikitext, delete elements or change their order. |
 |
Nested templates | |
| Templates can include other templates as the value for parameters. You’ll recognize it when you see a parameter whose value contains the double curly braces ( {{ }} ) denoting a template.
The VisualEditor can’t present this template within a template (a nested template) using the editor’s easy-to-use interface, so if you want to nest a template yourself, you’ll need to understand how to add the template by hand in wikitext into the appropriate parameter field. |
 |
Completing your edit | |
| Mikor készen vagy a sablon szerkesztésével, kattints erre: Változtatások alkalmazása, hogy bezárd a párbeszédpanelt és visszatérj az oldal szerkesztéséhez. Then you can preview your edit and make sure it looks the way you want and expect.
You may also see an error message, which (like the other TemplateData mentioned above) is community-provided content and may vary in usefulness. You may need to consult the template’s own documentation to get to the bottom of some errors. If you’re still having trouble, consider posting about your problem on the template’s talk page. |
|
Removing a template | |
| To remove a template in the VisualEditor, click the template box. Press the "Delete" or "Backspace" key on your keyboard. The template will disappear from the page. |  |
Editing on mobile | |
| When editing a template on a page using the VisualEditor on a mobile device, you’ll see that the sidebar starts out hidden. You can make it visible by pressing the “Show/hide options” button. |  |
Helyettesítő sablonok | |
| When you insert a template in a wiki page, its content and appearance are reevaluated every time the page loads, based on the template code and the values of its parameters. This means if someone updates the code of a template, then every page which uses that template will also get updated when they publish.
There’s another, much less common way to use templates, though, and that’s to substitute a template. Doing this permanently includes the template content just as it appears at the moment you insert it. It will not update if the template code is later changed. Most users won’t ever need to resort to substitution. Substitution is typically only useful when you need to capture the exact appearance of one version of a template, such as when content is under development and needs evaluation. To substitute a template in the VisualEditor, insert a template using the name syntax When you’re finished, press “Beszúrás”, which will insert the template content as you see it. |
 |
Listák szerkesztése
Táblázatok szerkesztése
Kategóriák szerkesztése
 |
To edit categories, on the "Lapbeállítások" menu, press the "Kategóriák" item. |
 |
A Kategóriák gombra kattintva megnyílik egy párbeszédpanel, ahol a már létező kategóriák lesznek felsorolva, ehhez hozzáadhatsz újabbakat, vagy törölhetsz meglévőket.
Létezik egy opció arra, hogy konfiguráld a választókulcsot a kategóriák oldalának listázásához. For example, the default sorting key for the article "George Washington" is "Washington, George". In the category "Presidents of the United States", the article is listed under the letter "W", not the letter "G". |
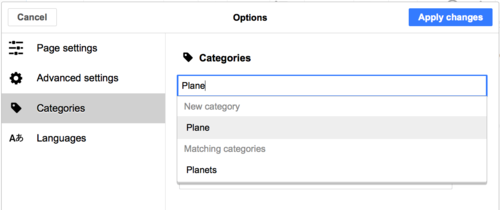 |
Ahhoz, hogy új kategóriát adhass hozzá, gépeld be a nevét az Kategória hozzáadása részbe. Kiválaszthatsz innen egy már létező kategóriát, vagy újabbat is adhatsz hozzá. (amíg a kategória nincs létrehozva, a link piros lesz). |
 |
Kategória eltávolításához kattints rá majd a megjelenő párbeszédpanelen a szemetes ikonra ("Eltávolítás").
Pressing on a category also allows you to specify a sorting key for that specific category. Such a sorting key overrides the default sorting key. |
| Kattints a Változtatások alkalmazása feliratra, ha végeztél a kategóriák szerkesztésével és térj vissza az oldal szerkesztőjébe. | |
Oldalbeállítások szerkesztése
Térképek szerkesztése
 |
Hozzáadhatsz és módosíthatsz térképeket. Lásd: Help:VisualEditor/Maps. |
Matematikai képlet szerkesztése
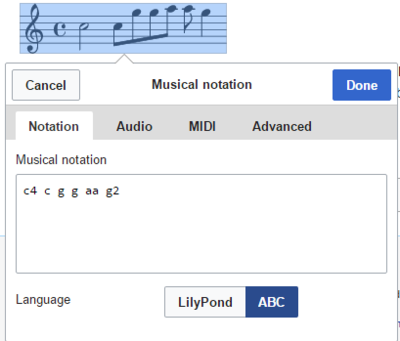
Kották szerkesztése
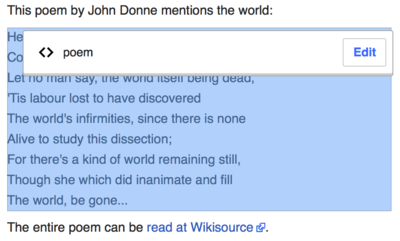
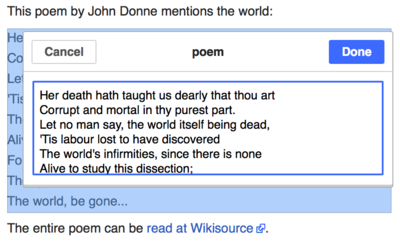
Versek és egyéb speciális tételek szerkesztése
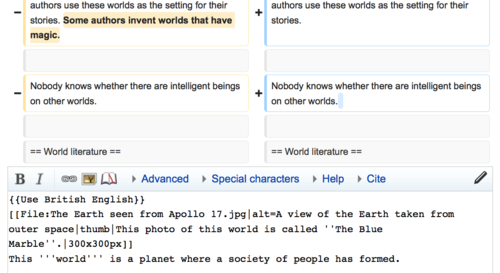
Switching between the visual and wikitext editors
Billentyű-kombinációk
Számos szerkesztő a szöveget dőlt, vastag betűvel és wikilinkkel együtt gépeli be. A billentyű-kombinációk funkció lehetővé teszi a gyors formázást anélkül, hogy az eszköztárat kellene használni. Itt van néhány gyakori gyorsbillentyű a Visual Editorban:
| PC shortcut | Művelet | Mac shortcut |
|---|---|---|
| Ctrl+B | Félkövér betű | ⌘ Cmd+B |
| Ctrl+I | Dőlt betű | ⌘ Cmd+I |
| Ctrl+K | Hivatkozás beillesztése | ⌘ Cmd+K |
| Ctrl+X | Kivágás | ⌘ Cmd+X |
| Ctrl+C | Másolás | ⌘ Cmd+C |
| Ctrl+V | Beillesztés | ⌘ Cmd+V |
| Ctrl+Z | Visszavonás | ⌘ Cmd+Z |
Also see the full list of all keyboard shortcuts.


