Help:VisualEditor/Guía del usuariu
| Avisu: Al editar esta páxina, aceutes distribuir la to collaboración baxo llicencia CC0. Llei les Páxines d'ayuda de Dominiu públicu pa más información. |
| VisualEditor portal |
|---|
 |
| General |
| Tocante a |
| Ayudar col llanzamientu |
| Si quies probar VisualEditor sin editar un artículu, equí hai una páxina onde pues facelo. Nun necesites una cuenta pa usar VisualEditor nesa páxina. |
Abrir el Editor visual
Primeros pasos: la barra de ferramientes de VisualEditor
| La barra de ferramientes de VisualEditor apaez no alto de la pantalla al principiar la edición con VisualEditor. Incluye dellos iconos familiares: | |
| Desfacer y Refacer los cambios fechos. | |
 |
Menú estenderexable Cabeceres: permite camudar el formatu del párrafu. Pa cambiar l'estilu d'un párrafu, pon el punteru nel mesmu y seleiciona un elementu d'esti menú (nun necesites seleicionar testu). Los títulos de seición tienen el formatu «$format», y les subseiciones son «$subheading2», «$subheading3» y asina socesivamente. To change the style of a paragraph, put your cursor in the paragraph and select an item in this menu (you don't have to highlight any text). Section titles are formatted "Cabecera", and subsections are "Cabecera secundaria 1", "Cabecera secundaria 2", and so on. El formatu normal pal testu ye «Párrafu» |
 |
Formatu: Al facer click en «A» ábrese un menú.
If you have not selected any text, then when you press the "A" to open the menu, and then select an item, that formatting will apply to the text that you start typing, from wherever your cursor is located. |
 |
Ferramienta d'enllazáu: L'iconu de la cadena ye la ferramienta d'enllazáu. Al facer click nella (de vezu después de seleicionar un testu) ábrese'l diálogu d'enllazáu. |
 |
Menú Citar: El menú «Citar» úsase p'amestar cites en llinia (llamaes tamién «notes al pie» o «referencies»). Tolos proyeutos tienen accesu al formatu básicu de referencies y la capacidá de reutilizar cites usando esti menú. Esti menú tamién da a los usuarios accesu rápidu a les plantíes de cita llocales, si tán activaes na wiki. |
 |
Botón Citar: Si'l serviciu citoid ta activáu na to wiki, verás un botón Citar en llugar d'un menú Citar.
(Les instrucciones p'amestar les plantíes de cita llocales al menú Manual d'una wiki determinada tán disponibles en VisualEditor/Citation tool) Instructions for enabling the Automático tab are available at Enabling Citoid on your wiki El serviciu citoid intenta rellenar automáticamente les plantíes de cites. |
 |
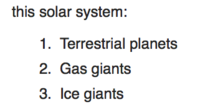
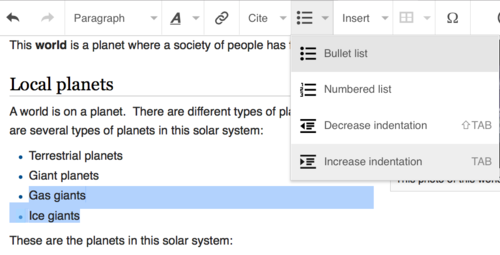
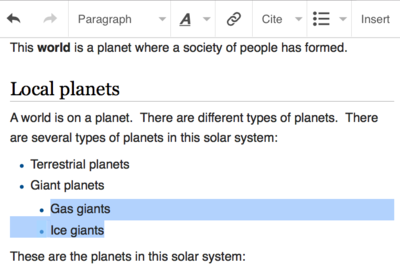
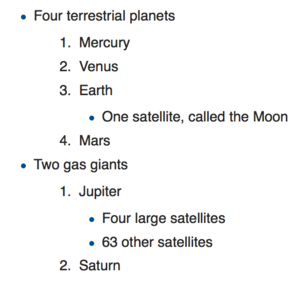
Llistes y sangría: Los dos primeros iconos permiten facer llistes numberaes o de viñetes, respeutivamente. Los dos últimos permiten aumentar o amenorgar el nivel de sangráu del conteníu. |
 |
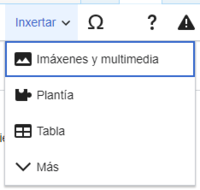
Inxertar: El menú "Inxertar" pue ser diferente en dellos proyeutos. Abaxo ta la llista de toles opciones que puen apaecer.
|
| Insertar un caráuter especial: L'iconu «Caráuter especial» (Ω) ta cabo'l menú «Inxertar». Al primir nel apaez un diálogu qu'amuesa munchos caráuteres especiales. Al facer clic nun caráuter determináu, póneslu nel testu. estos caráuteres especiales incluyen dellos símbolos estándar, diacríticos, y símbolos matemáticos. (Esta llista pué personalizase de mou llocal. Mira VisualEditor/Special characters pa más instrucciones). | |
| The Edit notices button displays any notices for the page. | |
 |
The Opciones de la páxina menu is to the left of the Espublizar los cambeos button and the Cambiar d'editor menu. On this menu there is a button to open an Opciones dialog with the following (left side) tabs:
The tabs of the Opciones dialog are also displayed in the Opciones de la páxina menu and can be opened by clicking on it. Furthermore the Opciones de la páxina menu contains the items Ver d'izquierda a derecha or Ver de derecha a izquierda and the item Buscar y trocar, which opens a bar, where you can insert words or regular expressions you are searching for and those to replace them with, together with several buttons for options. |
| The Cambiar d'editor button is next to the Espublizar los cambeos button. It allows you to switch to the wikitext editor. | |
Guardando los cambios
Editar los enllaces
 |
Los enllaces puen amestase col iconu "Enllaz" (eslabones d'una cadena) de la barra de ferramientes, o usando l'atayu Ctrl+K (o ⌘ Command+K nun Mac).
Si seleiciones (resaltes) testu y primes el botón "Enllaz" usaráse esi testu pa crear l'enllaz. Pa enllaces qu'afeuten sólo a una palabra puedes seleicionala o poner el punteru n'esa palabra. |
 |
Cuando uses el botón o l'atayu, abriráse un diálogu onde podrás escribir l'enllaz.
La ferramienta d'enllaz intentará ayudar colos enllaces internos buscando posibles coincidencies. En teniendo escritu o seleicionáu l'enllaz, el procesu d'enllazáu complétase primiendo ↵ Enter o primiendo el botón «Fecho». L'enllaz apaecerá dafechu na páxina de VisualEditor, pero igual qu'otros cambios, nun se guardará mentanto nun se guarde la páxina entera. |
 |
Pa enllazar a una páxina web esterna, el procesu ye asemeyáu: seleiciona la llingüeta «Sitiu esternu» y escribe una URL nel cuadru. |
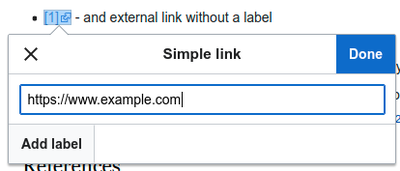 |
Los enllaces esternos sin etiquetes vense como esti: [1]. Pues amestalos poniendo'l punteru fuera de cualquier palabra (p.ex. después d'un espaciu). Abre la ferramienta enllaz faciendo clic nel botón o primiendo les tecles d'atayu. Escribe la URL nel cuadru, y fai clic nel botón «Fecho» pa insertar l'enllaz. |
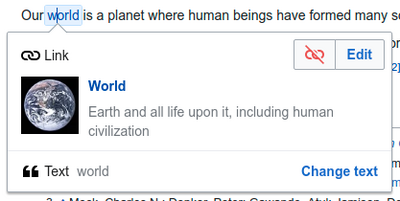 |
Pa camudar o desaniciar un enllaz esistente, fai click nel testu del enllaz, y llueu prime l'iconu "Enllaz" qu'apaez cabo'l mesmu. Apaecerá'l diálogu pa editalu. (Tamién pues aportar al diálogu col atayu de tecláu Ctrl+K.) When a link is selected, it appears as blue framed.
Nel diálogu d'edición d'enllaz podrás darréu cambiar el destín del mesmu. Tamién pues desanicialu dafechu primiendo nel botón «Desaniciar» de la esquina superior derecha del diálogu. Tamién pué abrise'l destín del enllaz n'otra ventana faciendo click na copia del enllaz del cuadru de diálogu. (Escurque t'interese facelo pa comprobar si un enllaz esternu ye válidu.) If you want to exit the link label (the text displayed as a link) or continue to write after this link, you can press →:
To edit the link label of an existing link, press within the link label and type the new one. But if you want to replace the entire label, please note:
|
Editar les referencies
- For further information, see Help using citation templates or Help using citoid's Automático tab
Determining which system is in place | |
| Your wiki may use one of three footnote systems. The one shown on the right is the simplest system, where the "Citar" menu does not include any citation templates. If your wiki uses this system, then everything you need to know about footnotes is on this page. |  |
 | |
| In the second system, you again start by pressing the Citar button. Then a dialog box opens, which includes several popular citation templates set up for quick access in the "Manual" tab. If your wiki uses this system, then you will find more details at Help:VisualEditor/User guide/Citations-Templates |  |
| In the third system, you again start by pressing the Citar button. Then a dialog box opens, which includes an automatic citation process using the citoid service under the Automatic tab. If your wiki uses this system, you will find more details at Help:VisualEditor/User guide/Citations-Full |  |
|
Editar una referencia esistente | |
| Pa editar una referencia esistente, fai click onde apaeza nel testu (de vezu como un númberu ente corchetes). Verás o un iconu "$ref" (marcapáxines) o un iconu (y nome) de la plantía que s'usó pa creala. En dambos casos, al facer click nel botón «Editar» abriráse un diálogu onde pues editar la referencia. |  |
| Pal iconu «$ref», al calcar en «Editar» abre'l diálogu Referencia. Pa principiar a editar la información de la referencia, primi nél.
Munches wikis usen plantíes pa dar formatu a les referencies. Si s'usa una plantía na referencia, al pasar el mur pela información de referencia resáltase tola información d'esi campu. Si s'usó una plantía y ficisti click na información d'esa plantía, apaecerá l'iconu $template (pieza de rompecabeces). Fai click nesi iconu pa editar el conteníu de la plantía nel diálogu del mini-editor de plantíes. |
 |
| If what appears when you press on a reference is an icon for a standard template for citations (an example is at right), then pressing "Editar" will open the template editor dialog. |  |
| Dientro del mini-editor de plantíes, pues amestar o desaniciar tipos d'información o cambiar el conteníu actual. Supuestamente, sólo los campos (parámetros de la plantía) que tienen conteníu s'amuesen al principiu. P'amestar campos, fai clic en "Añadir" abaxo del mini-editor. |  |
| Calca "Aplicar los cambeos" cuando termines. | |
Re-utilizar una referencia esistente | |
| If the page already contains a citation that applies to the text you want to source, then you can choose to re-use that existing citation.
Pa reutilizar una referencia esistente, ponga'l punteru nel llugar del testu onde quier amestala, y calque nel iconu "Referencia" (marcapáxines) de la barra de ferramientes. (Note: If your wiki has the second or third footnote system described above, you'll see a "Reutilizar" tab, in a dialog, instead of a "Reutilizar" item on the "Citar" menu.) |
 |
| Nel diálogu $reference-title, busca na llista la referencia que quies reutilizar, y seleiciónala. Si hai munches referencies, pue usar la barra de gueta (etiquetada «$input») pa ver sólo les referencies que casen con un testu determináu. |  |
Amestar una nueva referencia | |
| P'amestar una cita usando'l menú "$cite", pon el punteru nel llugar del testu onde quies amestala. Llueu seleiciona'l tipu de cita apropiáu nel menú. Then click "Básica". |  |
Usar la cita "Básica" | |
| Shown here is what you will see if you select the basic references item. Nel editor de referencies pue amestar, editar y dar formatu a la so cita.
Pues facer que la referencia perteneza a un grupu determináu, anque normalmente esto déxase'n blanco. (Esta opción úsase p'amosar grupos de referencies cola ferramienta «Llista de referencies»). |
 |
| In the Reference dialog, if you want to include a citation template, or any other template, in your new reference, press the Plantía icon (puzzle piece) in the "Inxertar" toolbar menu within the Reference editor. |  |
| Then, look for the template you want to use, add it and edit it as you would any other template. (See the Editing templates section, below, if you need more information about templates.)
After you are done editing your new template, press on "Aplicar los cambeos" to return to the Reference editor, and "Aplicar los cambeos" again to return to the page you are editing. |
 |
| If there isn't already a list of references on the page (for example, if you are adding the first reference for the page), you need to specify where the list of references, and their text, will be displayed to the reader.
Place the cursor where you want to display the references list (usually at the bottom of the page), open the "Inxertar" menu and press the "Llista de referencies" icon (three books). |
 |
| If you are using several groups of references, which is relatively rare, you can specify the group in this dialog. Only the references that belong to that group will be displayed on the page at the location where you are placing the group.
The final step in the References list dialog is to press "Inxertar". |
 |
Usar plantíes de cita estándar | |
| Your local wiki may have added extra citation templates to the "Citar" menu. If so, you have quick access to the most-used citation templates for your wiki. (Instructions for adding extra citation templates to your local wiki are available at VisualEditor/Citation tool.) |  |
| Pressing on a template icon such as "Cite book" will take you into the template editor for that template. Important information fields may be marked with an asterisk. While the most common fields will be shown, not all of them are required. |  |
| To add more parameters, scroll down in the template editor and press on the "Añadir" option.
Press on "Inxertar" when you are done. |
 |
Editing images and other media files
Uploading images
Editing media galleries
Editing templates
The powerful MediaWiki template system lets you insert dynamic content, text from other pages, and much more. For a detailed explanation and examples, see the Templates help page.
In the VisualEditor you can search for a relevant template, add an invocation or transclusion on the page you’re editing and, if needed, add custom content using parameters.
Insert new template
| To add a template to a page, place your cursor at the position on the page where you want the template to be inserted. Then open the Inxertar menu and select " |
 |
| Find the template you want to insert by typing either its name or a relevant keyword. Results containing the search term in either the name or description will display in a dropdown. This should help you find a relevant template, even if you don’t know its exact name.
If you’re having trouble finding the kind of template you want by using keywords, you can look on other wiki pages with similar content and view or edit the page source to see which templates are in use. When you find the desired template’s name, you can type it into this field to insert it here. |
 |
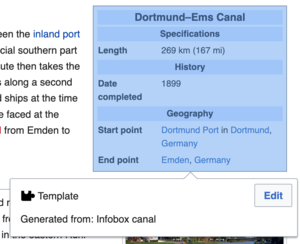
| You can also edit a template that’s already on a page. When you select the template you want to edit, it turns blue, and a box appears displaying " |
 |
| Some templates are not visible to someone reading a page. In the visual editor, such hidden templates are still shown so that you can click and edit or delete them. The name of the template will be shown next to the puzzle icon and both will be grayed out. |  |
Template parameters | |
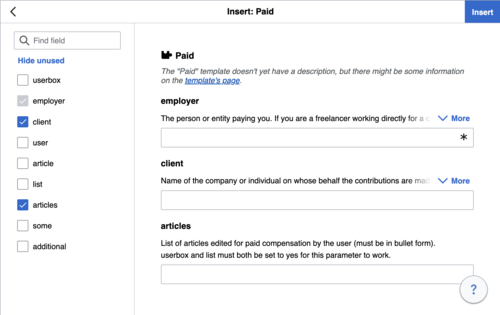
| You’ll see this dialog box when you’re adding a new template or editing one already in place. What you see in the box depends on whether the template in question contains TemplateData, helpful metadata added by other editors to make it easier to edit templates in the Visual Editor.
When a template contains TemplateData, the VisualEditor can use it to present annotated fields for you to fill in.
|
 |
| You can disable any optional parameter (which have blue checkboxes on the left side). If a parameter’s checkbox is grayed out and not clickable, the template requires that parameter, so it can’t be disabled.
When you insert a new template, you may find that some optional parameters are pre-selected. That means the author(s) of the template recommends the use of those parameters. It’s best to review all parameters that will be used in a template to ensure you understand their use. Clicking an unchecked parameter adds it to the template. Clicking a parameter that’s already been added takes you to the parameter’s input field. Some template parameters will show as “deprecated”. Don’t use deprecated parameters when inserting a template; they’re only visible to you because those parameters are in use on older pages where this template was included. |
 |
Adding undocumented parameters | |
| If you’re inserting or editing a template whose author hasn’t laid out its parameters in TemplateData, it has what we call “undocumented” or “unnamed parameters”. In these cases, you should consult the page for the template itself. There you can learn how to correctly employ and work with all of the template’s parameters. This includes learning the exact names of the parameters as written by the template author.
If you find in the documentation that the template expects parameters without names, fill in numbers as placeholders for the parameter names using the undocumented parameter input, then add text to the values you want to provide as you normally would. Example:
If you accidentally include nonexistent, misspelled or erroneous parameters, the values you enter for those parameters won’t show up on the page you’re editing. |
 |
Autogenerated parameters | |
| In this example, the template in question lacks TemplateData but it was possible to autogenerate the parameters. This means that the undocumented parameters have already been added for you, but the names may not be easily understandable and the dialog cannot display any directions or descriptions. As a result the dialog box provides a link to the template’s documentation, which should help you deduce and fill in the template’s various parameters. |  |
Editing multi-part template content | |
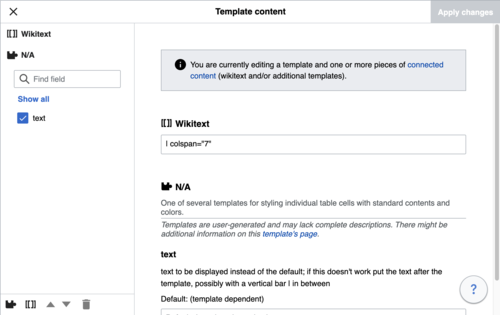
| During editing, you may open template content consisting of multiple templates or a single template linked to some wikitext. This differs from the nested templates described below. In this case, the templates are better visualized as being stacked or connected.
This content often contains “unbalanced templates,” templates which are incomplete on their own and need to be paired with some wikitext or another template in order to function. These related pieces of template content must be created in wikitext, but can be edited in the VisualEditor. In these cases you will see a notice at the top of the dialog to signal the situation and a specialized toolbar will be visible at the bottom of the sidebar. There you can use the icon buttons to add additional templates, additional wikitext, delete elements or change their order. |
 |
Nested templates | |
| Templates can include other templates as the value for parameters. You’ll recognize it when you see a parameter whose value contains the double curly braces ( {{ }} ) denoting a template.
The VisualEditor can’t present this template within a template (a nested template) using the editor’s easy-to-use interface, so if you want to nest a template yourself, you’ll need to understand how to add the template by hand in wikitext into the appropriate parameter field. |
 |
Completing your edit | |
| When you have finished editing a template, you can click "Aplicar los cambeos". Then you can preview your edit and make sure it looks the way you want and expect.
You may also see an error message, which (like the other TemplateData mentioned above) is community-provided content and may vary in usefulness. You may need to consult the template’s own documentation to get to the bottom of some errors. If you’re still having trouble, consider posting about your problem on the template’s talk page. |
|
Removing a template | |
| To remove a template in the VisualEditor, click the template box. Press the "Delete" or "Backspace" key on your keyboard. The template will disappear from the page. |  |
Editing on mobile | |
| When editing a template on a page using the VisualEditor on a mobile device, you’ll see that the sidebar starts out hidden. You can make it visible by pressing the “Show/hide options” button. |  |
Substituting templates | |
| When you insert a template in a wiki page, its content and appearance are reevaluated every time the page loads, based on the template code and the values of its parameters. This means if someone updates the code of a template, then every page which uses that template will also get updated when they publish.
There’s another, much less common way to use templates, though, and that’s to substitute a template. Doing this permanently includes the template content just as it appears at the moment you insert it. It will not update if the template code is later changed. Most users won’t ever need to resort to substitution. Substitution is typically only useful when you need to capture the exact appearance of one version of a template, such as when content is under development and needs evaluation. To substitute a template in the VisualEditor, insert a template using the name syntax When you’re finished, press “Inxertar”, which will insert the template content as you see it. |
 |
Editing lists
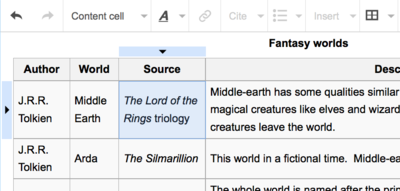
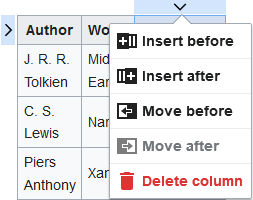
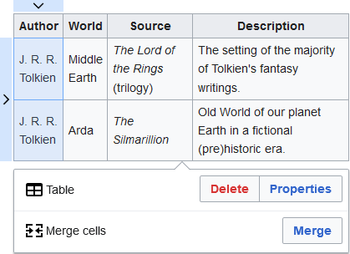
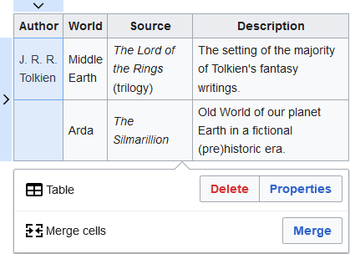
Editing tables
Editing categories
 |
To edit categories, on the "Opciones de la páxina" menu, press the "Categoríes" item. |
 |
Pressing on "Categoríes" opens a dialog that lists existing categories and allows you to add new ones, and to delete existing categories.
You also have the option of setting or changing the general (default) sorting key, which determines where the page appears when listed with other pages in the same category. For example, the default sorting key for the article "George Washington" is "Washington, George". In the category "Presidents of the United States", the article is listed under the letter "W", not the letter "G". |
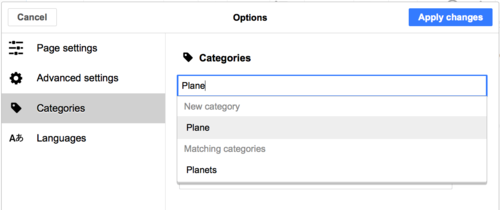 |
To add a category for a page, type the name of the category into the field "Añada una categoría". As you type, the visual editor will search for possible matching, existing categories. You can either select an existing category, or you can add a category that doesn't yet have its own category page. (Until that category page is created, your new category will show as a red link after you publish all your editing changes.) |
 |
To remove an existing category, press on it and press on the "Desaniciar" icon (trash can) in the dialog that opens.
Pressing on a category also allows you to specify a sorting key for that specific category. Such a sorting key overrides the default sorting key. |
| Press "Aplicar los cambeos" when you are done editing categories to return to the page editor. | |
Editing page settings
Editing maps
 |
You can add and change maps. See Help:VisualEditor/Maps. |
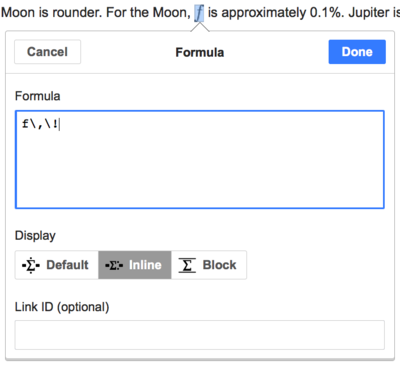
Editing mathematical formulae
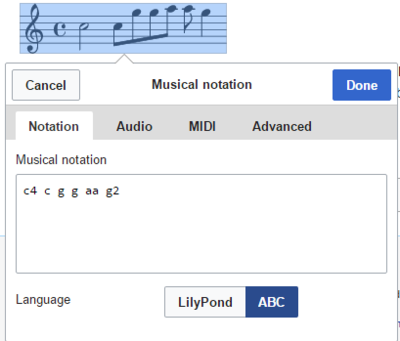
Editing musical scores
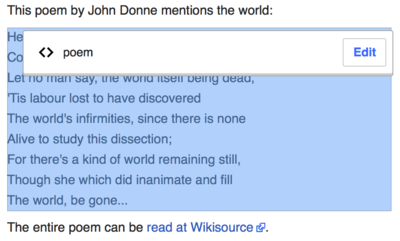
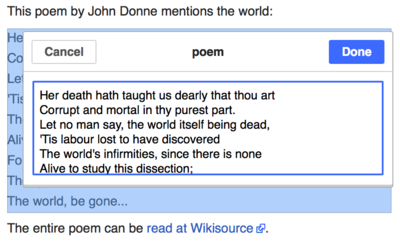
Editing poems and other special items
Switching between the visual and wikitext editors
Atayos de tecláu
Munchos editores tan avezaos a escribir testu wiki direutamente, especialmente negrina, cursiva y enllaces wiki. Los atayos de tecláu permiten inxertar de mou rápidu formatos asemeyaos ensin necesidá d'usar los elementos de la barra de ferramientes. Estos son los atayos xenerales comunes de VisualEditor:
| Atayu pa PC | Aición | Atayu pa Mac |
|---|---|---|
| Ctrl+B | Negrina | ⌘ Cmd+B |
| Ctrl+I | Cursiva | ⌘ Cmd+I |
| Ctrl+K | Inxertar enllaz | ⌘ Cmd+K |
| Ctrl+X | Cortar | ⌘ Cmd+X |
| Ctrl+C | Copiar | ⌘ Cmd+C |
| Ctrl+V | Apegar | ⌘ Cmd+V |
| Ctrl+Z | Desfacer | ⌘ Cmd+Z |
Also see the full list of all keyboard shortcuts.


